Vignetting

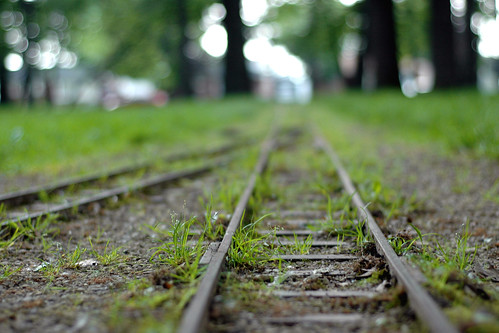
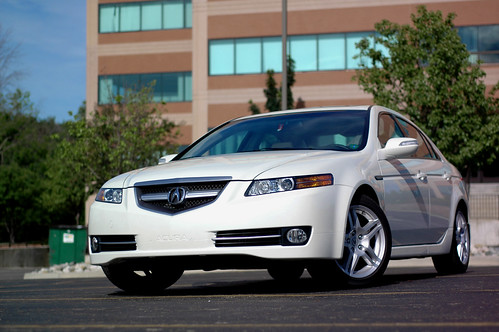
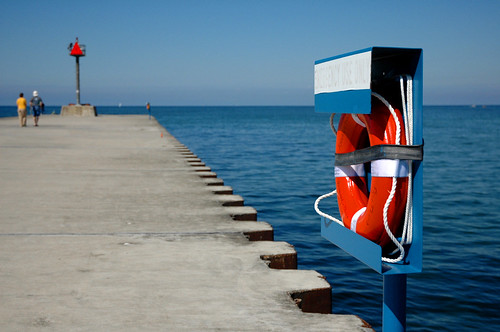
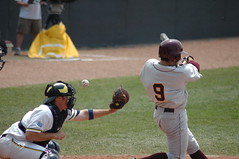
With older cameras and cheaper cameras, you may see this effect of black corners. This is known as vignetting. It is caused by light falloff from the center of the negative, and is usually the result of the lens. However, it can also be used for photographic effect.

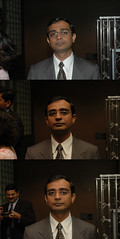
See in the above image how the subjects are emphasized by the darkening of the corners.

There are lots of different ways that you can achieve this technique. One is the camera itself. Using 'toy cameras' will often give this image without any effort. It can also be done in the darkroom by dodging and burning (under or over exposing parts of a shot). Digitally, suites like Photoshop have dodging and burning tools.

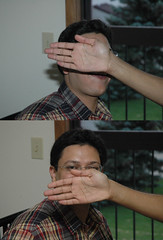
However, the trick to vignetting is figuring out when to use it, and that's a lot harder to figure out. Portraiture makes sense though, and I think the above example works well.

What is bokeh?

When you use a narrow depth of field, there is a significant amount of blurring of the background, and some lenses are more keen about this blur than others. Bokeh is a Japanese term meaning "blur" and it refers to the aesthetics of the blurred background.

Some lenses are much better at this effect than others, and I've found that my 50mm Nikkor is quite excellent at it, but the kit lens sucks. There's some skill required too, as you need to have good focus and good lighting, and the key is always narrow DoF.

When you have complete control...

So, I thought it was about time that I took my car and did some decent shots. I went over to a bank parking lot on Sunday and made a day of it, shooting about 200 shots. I put this picture here as an example of a shot that came out well (I hope you can agree with that assessment) but still has some significant issues that could definitely be improved.

First, what I did well. The car is shot at an angle, from a low point of view, with the wheel turned. All these touches give the vehicle a novel and deep view, adding a 3D quality to the image that front or side views can't. I placed the car off center. I metered to get good exposure on the side of the car. I shot at a low f/stop to isolate my subject.

Here's what could be improved. Look at the background. There is a lamppost in the middle of the car. There's a trash dumpster to the side. The building is in only 3/4 of the shot. It would've been better to have all building or none.

The sunlight angle is casting a big shadow from the rear view mirror. It would've been better to reposition the car.

So you can see that when you have complete control over your subject, there are a lot of considerations that come into play when crafting your shot. And for a little humor on the subject of watching out for your backgrounds, take a look at this photo.

Cropping

I'm a little torn about this picture. I thought the subject itself was intriguing, and that I got good exposure and light balance. I've done no post work on this shot. The question however is composition.

It's hard to spot your own best photos. What I like sometimes turns out to be very unpopular, whereas the shot that I whimsically posted turns out to be a critical success.

My brother suggested a tighter crop; remove the background characters of the 'lighthouse' and people, but I thought that gave the photo dimension and scale.

In thinking about it some more, I think I really would've liked to have shot from a lower angle and pushed the horizon to near the top of the frame. Of course, you can't do that in post work.

The principle of bouncing flash


This is another example of the principle of a bounced flash. A bounced flash is when you use a flash and instead of directing it just at your subject, you reflect it or redirect it to diffuse the light. The reason for this is obvious in the example: it creates a more pleasing image especially in portraiture.

You can aim the bounce to the ceiling, especially with a relatively low, white painted roof. This will create extra light from above. Or you can aim it behind you to broadly diffuse the flash. You can use a large reflective surface or white board held up by an assistant to angle additional light at the subject. You can set up remote flashes if you're in a studio. You can buy a flash umbrella and use this to diffuse the light. Or, as I did, you can buy a 3x5" index card and rubber band it to your flash.

The example shows on top, a directly aimed flash. Note that the color temperature is very cold. There's quite a bit of glare. The background is very dark.

The middle image shows the flash aimed directly at the ceiling, which in this case was high and dark. As a result, the shadows are coming from the ceiling and the color temperature is much warmer, and the background is visible, but it there's quite a bit of shadow under the eyes and chin.

The bottom image is a flash aimed at the ceiling and an index card rubber banded to the back of the flash, reflecting some of the flash forward. Note that there is strong lighting from the front, and also the diffused flash from above. There is some glare, but not bad. The shadows are very diminished. It is a more pleasing image.

The technique itself for bouncing a flash isn't the same as a directly aimed flash. You need to meter to account for some light from the flash, but not all. In truth, you might meter very close to what you would shoot without any flash. For the most part, it will require wide aperture.

The disadvantages of bouncing flash are actually numerous. It kills depth. Often, because you lose a lot of shadows, you lose depth and perspective and images can seem very flat. You also lose depth of field. With the very wide apertures, you typically end up focusing to infinity. Also, you typically light up the background well enough that you can lose the depth that the shadows would add. It's also a bitch to meter, since you can't rely on the flash setting or the ambient light metering.

But it adds a lot of warm lighting for portraiture and for still lifes, and can replace complicated lighting when you're out and about. If you look at photojournalists, there are still a lot that use the index card bounce flash in their pro work. So it does have its place.

Zooming in


I bought a new zoom lens 70-300mm 'G' Nikkor lens for my D70. It was a prize at $140, but it's not the greatest lens. Still, when no one's paying for my glass, I got to take what I can.

I really like sports photography, so this is a lot of fun for me, but obviously, I need a lot of work.

Bouncing flash


I was at dinner with the other residents, and everyone was asking me why I was shooting with the flash aimed at the ceiling, and with an index card rubber banded to my flash. I took these shots to show why.

The top part is direct flash, with sharp, harsh shadows. The lower image is with the bounce, and it looks much better, I think.

I don't get a lot of chances to shoot people, so I revel in dinners like this where I can get all my gear together and no one really minds.